
Shop Now
- ALUMINIUM HORSESHOES
- STEEL HORSESHOES
- THERAPEUTIC HORSESHOES
- HORSESHOE NAILS
- RASPS
- TOOLS
- WORKSHOP EQUIPMENT
- CARE
- MUSTAD MERCHANDISE
Blog Archives
Stay Connected Blog Categories
Farrier TipsTips and Tricks
Equine InfoHoof Conditions
General
Guest AuthorsCarl O'Dwyer
|
What is Seedy Toe?
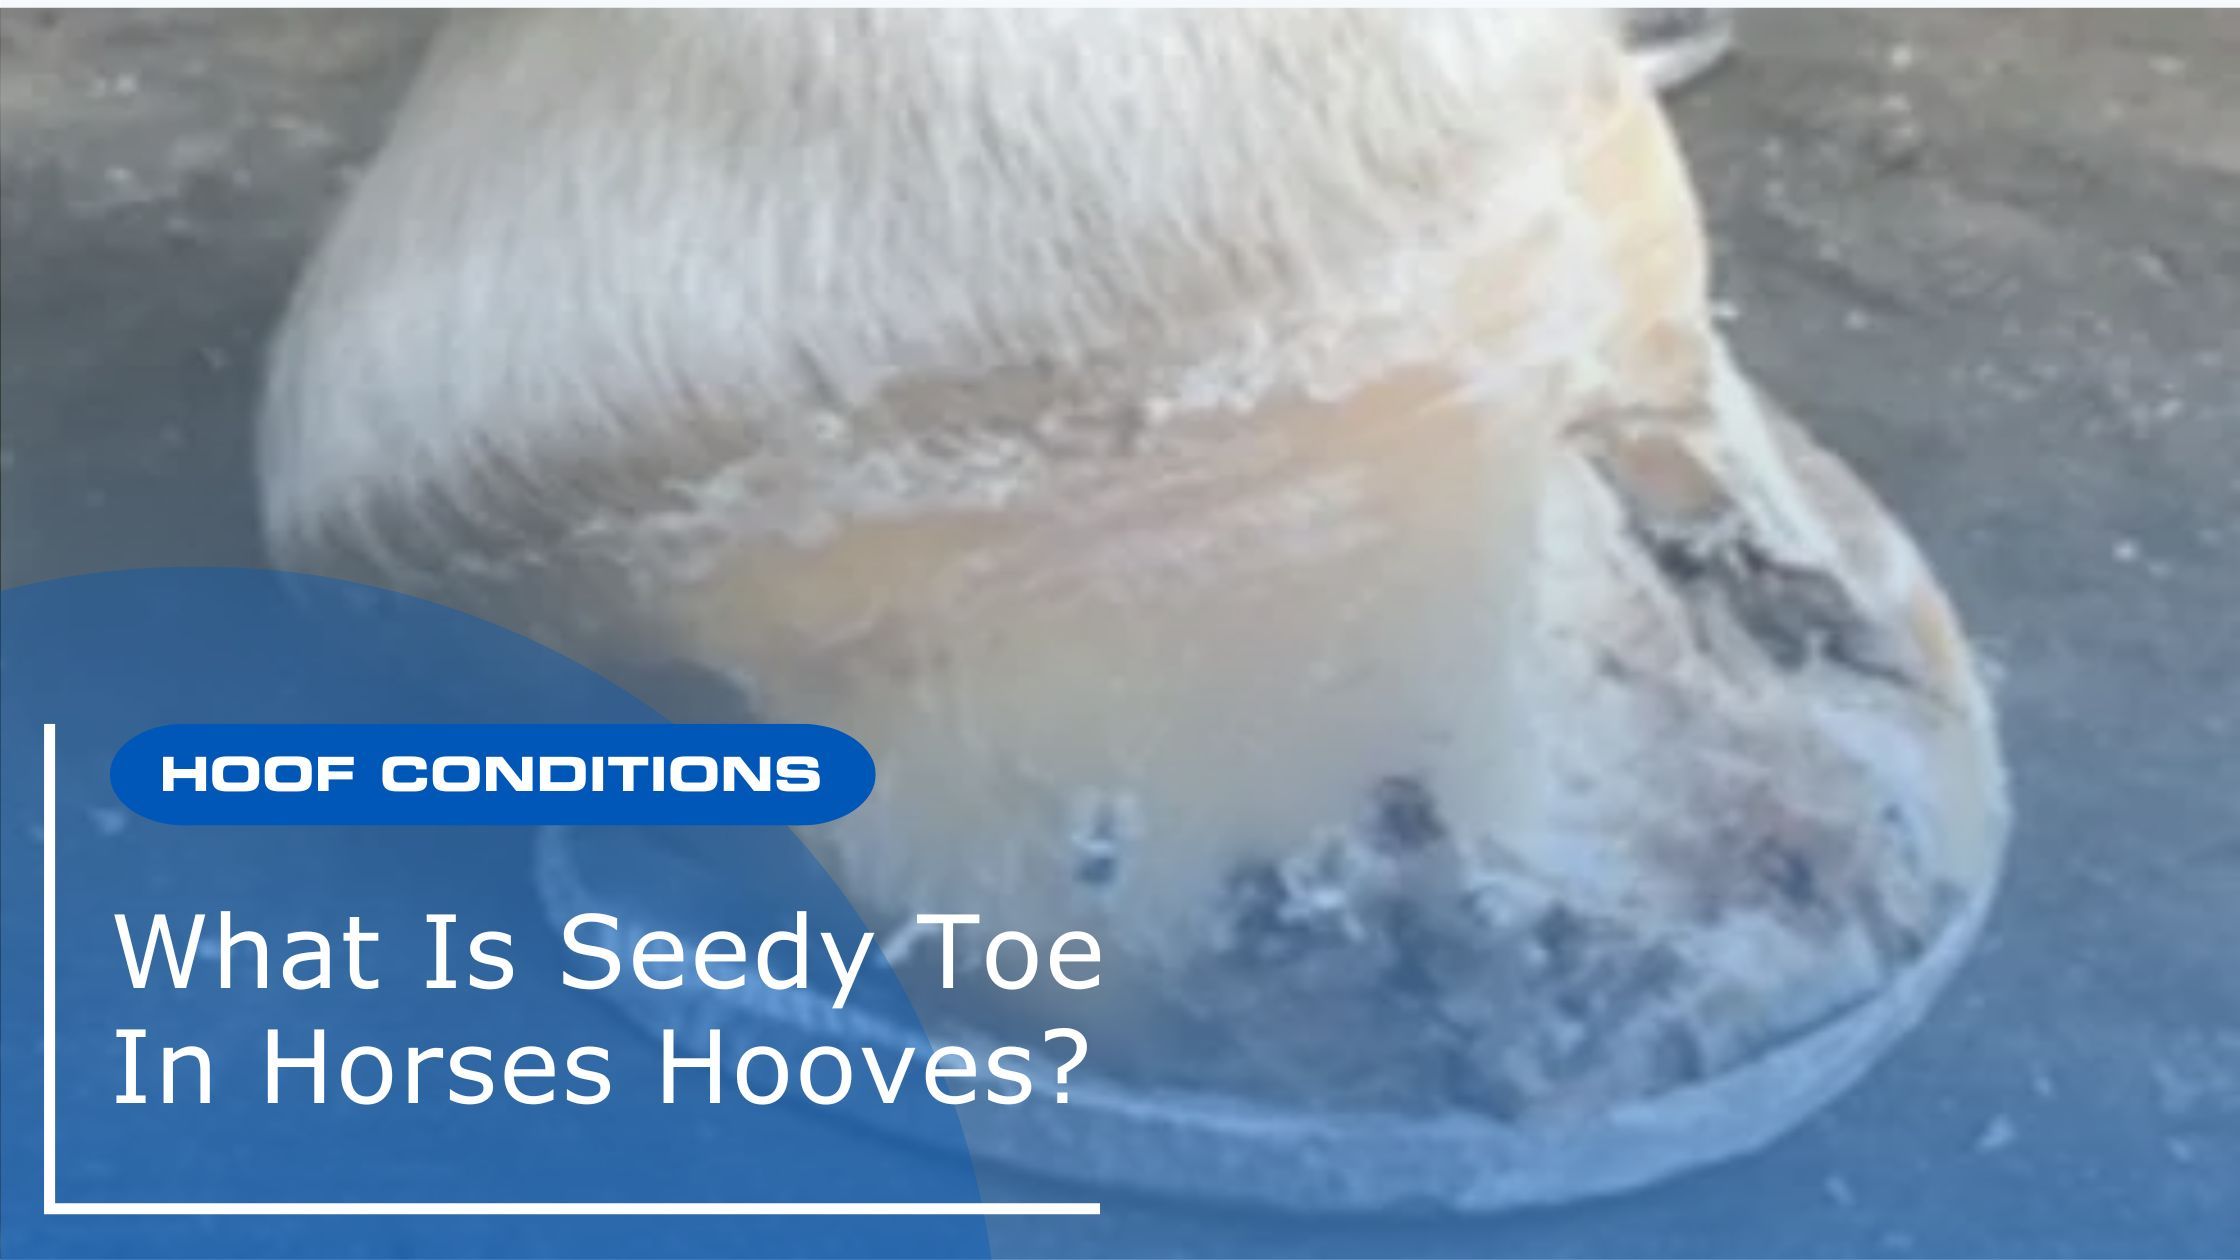
In short, seedy toe is an anaerobic bacterial infection / fungus that undermines the attachment of the Stratum Internum (inner hoof wall). In this blog we’ll look at the causes of seedy toe, recognising this ailment, how to treat seedy toe and a case study that follows treatment and recovery from a severe case.
The Difference Between Seedy Toe And White Line Disease
Throughout my career as a farrier, I have frequently heard people refer to seedy toe as white line disease. The use of this terminology is wrong and misleading. The white line emulates the terminal papillae and extends only a short way distally to the solar surface of the hoof. Seedy toe, on the other hand, extends all the way up the foot.

Causes Of Seedy ToeSeedy toe may start from a separation, sand crack, grass crack or gravel within the Stratum Internum (inner hoof wall). Here it is free from oxygen and acts like a little incubator that allows the bacteria to flourish. Often your farrier will treat such a crack at each appointment. Left over a shoeing cycle, however, these bacteria may rapidly advance, further undermining the attachment of the hoof wall. This can cause a serious problem if not attended to properly. Over the years it has been thought that certain climates or weather conditions such as humidity or excessive rain causing extreme mud were the primary cause of seedy toe. However, in my experience it can occur in almost any environment. |
 |
How To Recognise Seedy Toe In Horses
Usually, we see a black stained line or hole migrating up the hoof wall filled with organic material. In severe cases when it has been present for a long time without treatment, the hoof will sound hollow. The seedy toe may be migrating around the hoof capsule seriously undermining the attachment of the stratum internum.
Interestingly, one reason seedy toe is often overlooked is that the horse seldom goes lame because of it, until it is at a severe stage.
The next question I’m sure you're asking is, ‘how do farriers allow it to get to this point?'
In my experience, there are a few answers to this:
Firstly, it can progress very fast. As the farrier doesn’t attend to the horse daily, there may be no external signs for the owner to see that indicates there is an infection. All can seem fine until your farrier notices the seedy toe at their next appointment, once again showing the importance of regular shoeing intervals and not dragging them out to 8 weeks.
Secondly, your farrier may not fully understand the issue and how best to treat it. Often people are reluctant to pare away the hoof wall and expose the bacteria to oxygen, which is the best way to eradicate the bacteria. This reluctance may be because the farrier is not confident in resecting the dead tissue or does not want to suggest shoeing the horse to support the hoof until the situation is under control.
In addition, many farriers are unwilling to reascent the cavity, drawing attention to it and alarming the client. They tend to bury their head in the sand hoping it will go away. Unfortunately, I have seen this scenario in many cases, and it usually ends with the horse owner finding another farrier and often a vet as well to rectify the situation.
Therefore, being better informed and trained is the answer to this situation! I believe it’s always a good idea to have a friend, tutor, or a veterinarian to ask about such issues.
After all, we are always learning.
Throughout my career, my experience has been that explaining the issues to the client is the best policy. Another reason I do this is so the client can undertake ongoing treatment in between my visits, thus speeding up the recovery period.
Seedy Toe Treatment
First and foremost, my approach to treatment of seedy toe is to stabilize the hoof capsule as best I can. This of course will depend on the severity of the condition.
It may just be starting from a crack or separation. If this is the case, I will assess if a normal shoe will adequately stabilise the condition, or if I need to modify a shoe to stabilise it.
For example, if the horse is shod with a toe clip and the flaw in the hoof wall is where the toe clip will sit, I would remove the toe clip and shoe the horse with side clips. This will help stabilise the hoof and allow the client access to apply the best topical solution (such as Hoof Hygiene or Comfort Mix Thrush Treatment) to aid recovery.
However, if the seedy toe in the horse’s hoof is advanced, I have often seen clients call upon their vets to rectify a severe case. Often in these advanced cases, there are mechanical issues resulting in rotation of the pedal bone (P3) due to the undermining of the Stratum Internum.
In cases where rotation was diagnosed by a veterinarian by way of x-ray, for obvious reasons I usually opt for a bar shoe. I usually apply an Aluminium Heart Bar Shoe, or a bar shoe with a 3D pad and Dental Impression Material (DIM) to normalize the HPA (Rotation). I apply my shoeing package before resecting the dead hoof wall, to ensure I have a solid attachment. I often use an aluminium bar shoe with a wider section, thus providing more cover and stability, using the lightest material possible, as the hoof wall is already under stress.
I then proceed to open the seedy toe, removing the dead hoof wall and exposing the area to oxygen.
The majority of cases I have treated responded very positively to this treatment and all the horses have recovered well. Amazingly some of these were severe cases, where both the vet and I predicted that it would take a long time for the resected hoof to grow out! The horse’s foot has surprisingly grown much faster and normalized much quicker than our predictions, which only show what amazing adaptable animals horses are.
Owner Maintenance
The ongoing plan I coordinate with the client usually amounts to leaving the area open to oxygen (as it kills the bacteria) and application of a topical treatment daily. This can be made by mixing copper sulphate and apple cider vinegar together into a slurry and applying directly to the affected area with a tooth brush.
Note: I am sure there are a number of other topical products that are available on today’s market, this is just one I use.
A Note On Hoof Rebuild Material
Something that should be mentioned! I have seen people cover the affected area with synthetic hoof rebuild materials to make it more aesthetically pleasing.
This is not a practice I would recommend, as if there are any bacteria still present, covering it with polyurethane or acrylic acts like a little incubator and the bacteria thrives. Additionally, horses are more likely to get an abscess as a result of this process.
A Seedy Toe Case Study
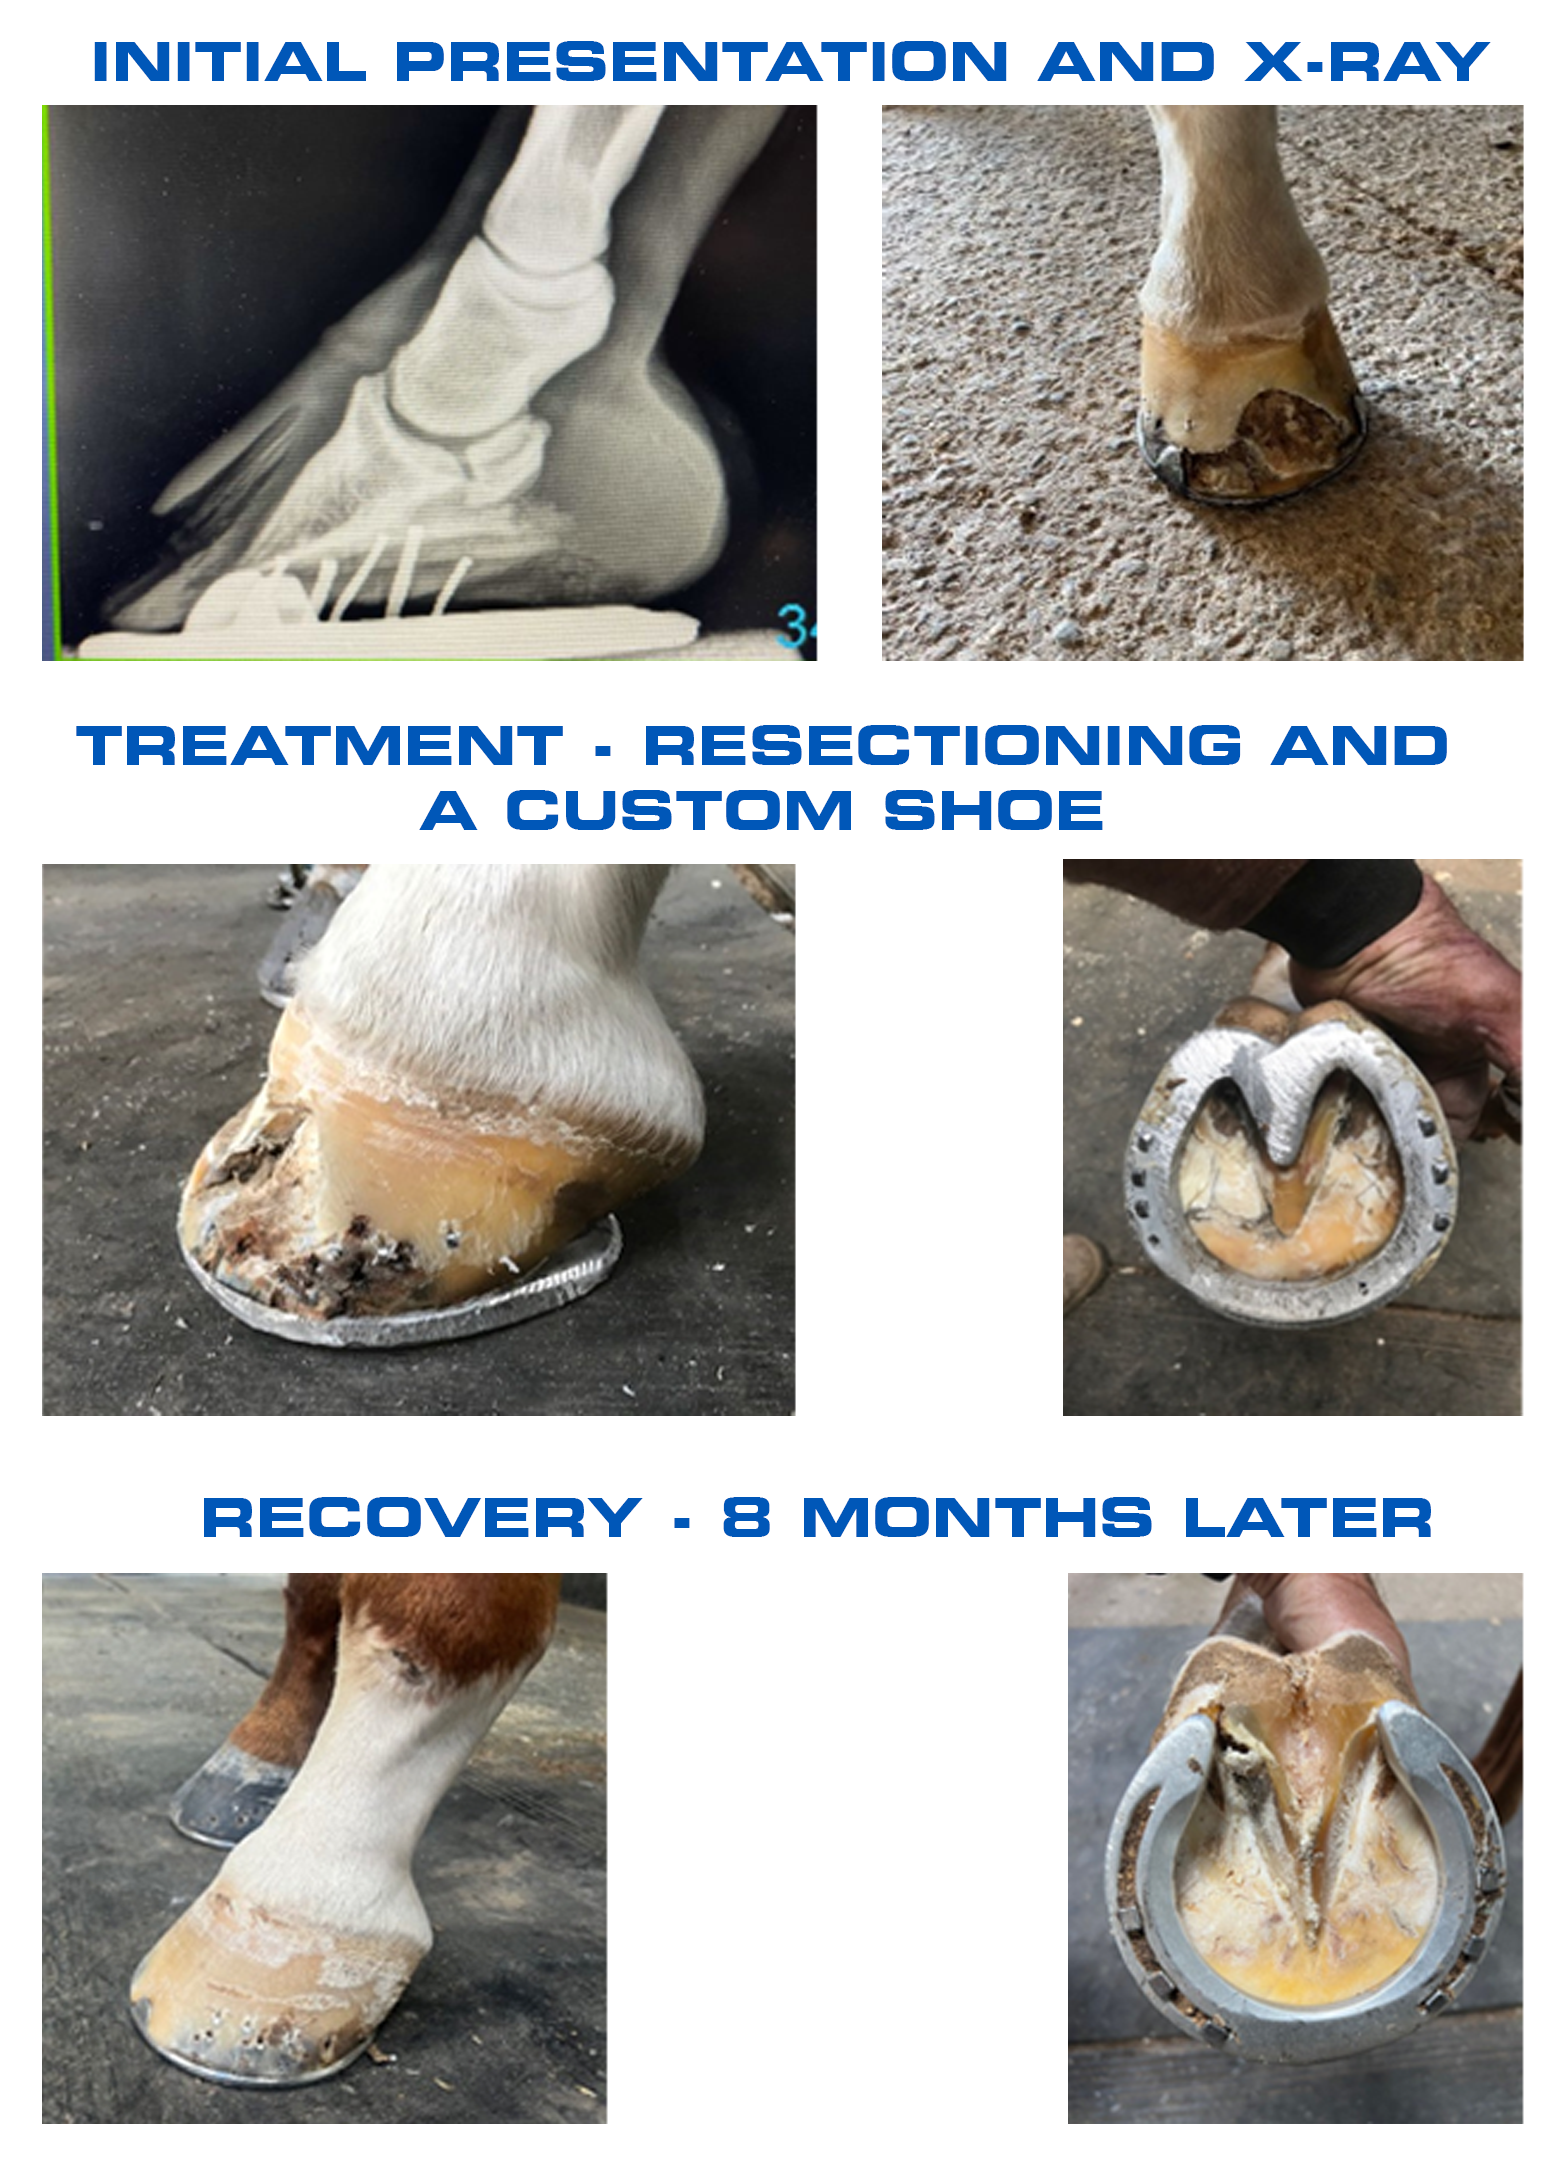
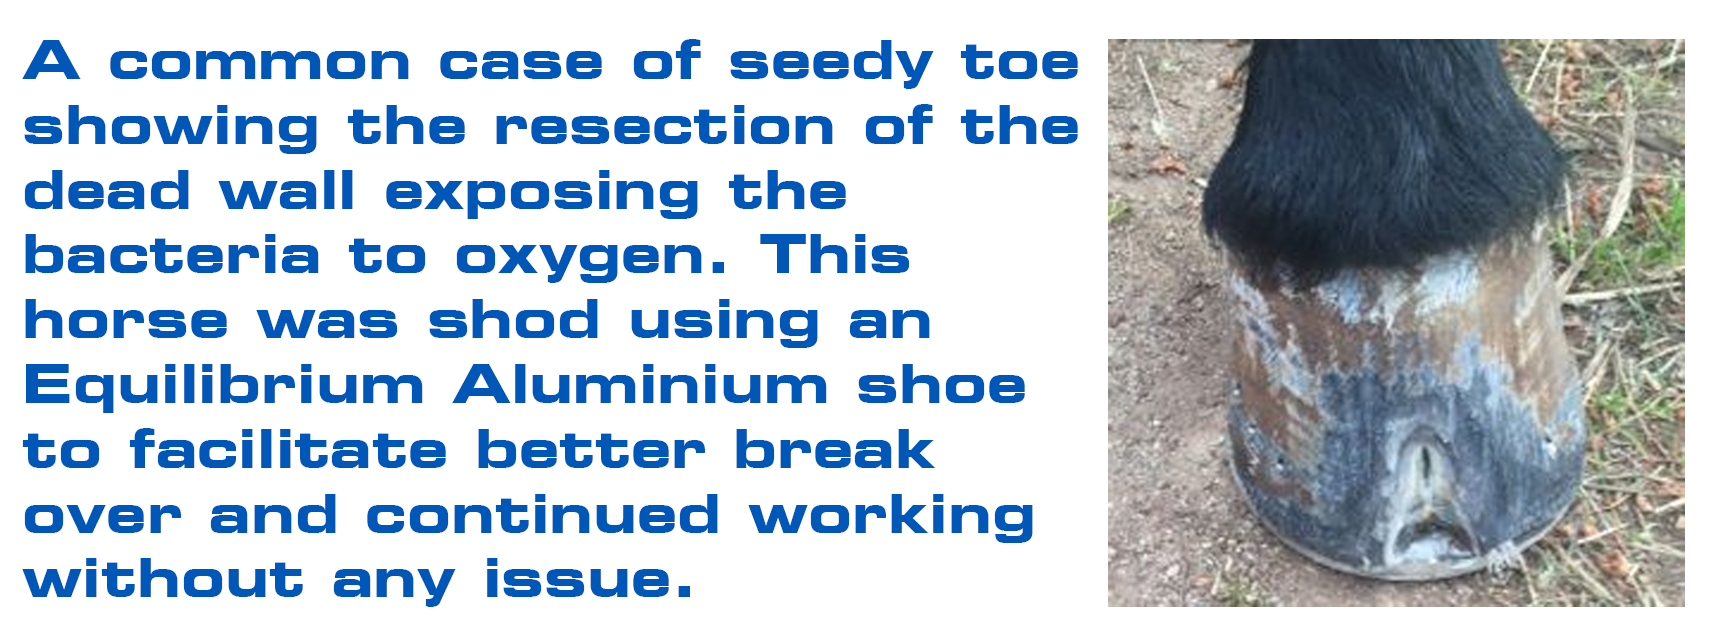
See above a severe case of Seedy Toe in a horse’s hoof!
You can follow the progressive images, from the x-ray taken by the consulting veterinarian to the resection of the dead hoof wall and shoeing package used on the first visit. You will notice I used handmade aluminium bar shoes. This allowed me to punch nail holes where an adequate amount of hoof wall was and gave the hoof stability without a heavy shoe.
The final two images are approximately eight months later. The horse is back in a normal Equilibrium Aluminium shoe, enjoying his career. A good result all round!
I hope this article has given you some insight into seedy toe.
Enjoy your equine activities.
Dean Lewis CJF, AWCF